

Quinoa with curried carrot and chard
My focus this Fall has been to create simple, hearty and nourishing meals that I can make in large batches and eat leftovers for at least a couple of meals. I’m noticing a certain pattern emerge when I need to cook this way. There’s a gluten free grain like quinoa, millet or rice that I cook separately. And I sauté whatever vegetables I have in the fridge. A bowl of the grain and sauteed vegetables, usually curried in some way, and a hard boiled egg makes for a very satisfying meal.
The awesome thing about cooking this way is that it gets much easier to accommodate food allergies! This dish is gluten free, soy free, dairy free, and FODMAP friendly for those with fructose malabsorption or fructose intolerance.
And this is absolutely my favorite way of making carrots!
So if you’re getting pampered with spectacular food or just over indulging at holiday parties, here’s a dish that looks stunning, tastes great but is also good for you. I must admit that my problem this holiday season has not been the food so much as the wine! Got any tips for me?
Curried Carrot And Chard Over Quinoa
Serves 4
- 1.5 cups quinoa
- 10 oz grated carrot (or 3/4 lb carrots, grated)
- 1/2 bunch chard, sliced into 1/2 inch shreds
- 1/2 piece of ginger, peeled and grated
- 3 dried red chilis, ends removed and cut into thirds
- 2 tablespoons vegetable oil
- 1 inch cinnamon stick
- 1 teaspoon black mustard seeds
- 10 fresh curry leaves (optional, I didn’t have any but it adds a lovely earthy aroma and taste)
- 1/4 teaspoon fenugreek seeds (optional)
- 2 teaspoons garam masala powder
- 1 teaspoon lime juice (or lemon)
- 3/4 teaspoon salt or to taste
Recipe
Put the quinoa, 2 cups of water and a big pinch of salt in a pot. Bring to a boil and then simmer on low, covered for 15 minutes or till the quinoa is cooked.
Heat the oil in a skillet or pan over medium high heat till you see ripples on the surface. If the oil is hot enough, a mustard seed thrown in will sizzle. Sizzle the whole spices for just 15 seconds or till the mustard seeds start to pop.
Add the ginger and garam masala and stir for 10 seconds. Immediately mix in the carrot and chard and cook for 2 minutes while stirring occasionally. Add 1/3 glass of water, and cover the skillet. Simmer for another 5-10 minutes or till the carrot is cooked.
Stir in lime juice and salt to taste.
Form quinoa cakes by pressing some cooked quinoa into a small and flat bowl; ramekins are perfect. Upturn the bowl onto a plate and voila, you have a quinoa cake. Place some of the curried carrot and chard on the quinoa and serve. Or if you are eating by yourself and don’t care about presentation, just mix it all up in a bowl like a quinoa salad.

Quinoa salad
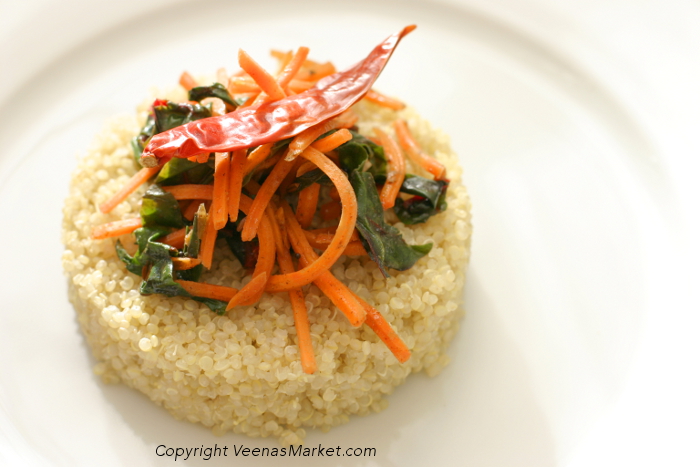
Sauteed carrot and chard on a bed of quinoa


